Results 1 to 7 of 7

Thread: Caribbean Reef Runner fitout with piccies

  1. #1

    Caribbean Reef Runner fitout with piccies

    Finally got around to the write-up

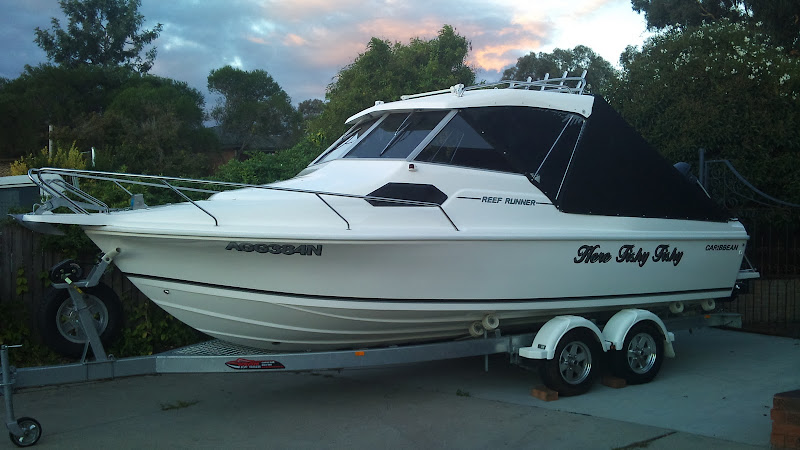
    Picked up our Caribbean Reef Runner from the dealer on the 5th January 2011. Initially we were to pick the boat up fully fitted out, however delays in the build and Xmas got in the way, so we chose to take it almost bare so as to be able to use it as we had 5 weeks holidays booked, and if we had waited, would have only had the boat for a week of that.
    As we picked it up, the boat was fitted with the Suzuki DF175 fourstroke, Dual batteries with BEP Switch combo with VSR, Garmin 750S, NMEA2000 backbone, factory covers and clears, rocket launchers, a 1250gph bilge pump and sat on an Easytow trailer with a reception rear and full length keel rollers.

    Towed it home to Canberra from Melbourne, arriving home at 5am on the 5th of January and set to work for an intensive 2 day fitout to sort the basics and get it registered in NSW.
    Finished the basic fitup at 2am on the 7th January, and headed for Bermagui, arriving at 5.30am, grabbing a quick bit of snooze and we were on the water at 2pm same day.
    The first item fitted was the bait pump and deckwash, a Johnson kit. These are fed through a stainless skin fitting through the hull approximately 200 forward of the transom and about 100mm to the port side of the keel. We fitted a stainless ball valve to the skin fitting, and the bait pump screws onto the valve, so it the plastic thread ever lets go, the valve can be closed. The locking device on the ball valve was removed to avoid jamming, if ever it needs to be used I did not want anything impeding the row of the lever.

    The deckwash pump was then mounted to the transom under the port side bait tank, nicely out of the way, but in hindsight, it should have been mounted closer to the side of the boat, as it is likely to interfere with the planned fitment of trim tabs in the current location.

    The deckwash was run around into the side pocket and the fitting secured through the rear brace/rod holder in the side pocket, allowing the coiled hose to sit neatly in the bottom of the pocket, close at hand without being in the way.

    When first fitted, we put the switches in the panel on the inside of the outboard well to minimise the length of the wiring. This turned out to be a mistake, as they became targets for knees when fishing. They have since been moved to the dash and the holes that were cut glassed up, coated with gelcoat and sanded/polished.

    We used right angle skin fittings to run the overflow from the bait tank out through the side of the hull. Another moment of 20/20 hindsight would be to place the overflow about 50mm lower in the tank, as at the current level, passengers sitting in that seat get splashed when travelling in a swell.

    The Johnson kit works well, and we have kept more than 20 good sized Yakkas 15-20cm alive for a full day, as we struggled to use them with the fishing being quiet that day.
    We then moved on to fitting radios, and initially we were going to mount them into the dash, we cut the holes and put the mounts in position, however when we fitted the radios to the mounts, the magnets in the speakers affected the compass. It was about then that I noticed that there is a void in the front of the hardtop, I removed the cabin light and had a look, then by taping the GME flush mount kits where I thought I could fit the radios, I drilled a small hole and used a piece of welding wire to confirm that sufficent depth was available to mount the radios. Happy that there was enough room, I marked out the cutouts and attacked it with an air hacksaw. I drilled a hole in the dash immediately above the in-cabin buzz bars, and inserted a length of split conduit, drilled another hole in the hardtop and inserted the other end of the conduit, and used Sikaflex to glue the conduit to the internal corner of the windscreen frame. I ran two 4mm cables through this conduit, and terminated them on the buzz bars. These cables supply power to the radios, and will also service the planned remote searchlight, LED docking and work lamps. At this time the radios are connected with crimps, but I will fit buzz bars inside the hardtop void to allow distribution for the planned lighting. Each radio is independently fused.

    Mounting the radios in the Hardtop means that it is practical to fit the aerials on the hardtop also. Not wanting to chance getting saltware into the void, I drilled a hole at the top of the void and ran the cable down through the hardtop exposed to the cabin and then into the void.

    The first set of aerial mounts we fitted were GME with the “colour coded” aerials, that scew together. This was a big mistake as the GME mounts rely on the aerial cable join to hold them in place. We had a day with some fairly rough weather, and the “whipping” of the aerials resulting in them pulling out of the bases and cracking one of the whips on the grab rail. I did get a full cash refund from BCF, so kudos where it is due. The GME mounts were replace with Pacific mounts and whips, these have a mechanical connection and push fit cable connection. They are a far superior mount for high load applications. In hindsight, I should have used rail mounts secured to the grab rails on the hardtop and avoided drilling as many holes in the roof, and ran the aerial cables straight into the void and used Sikaflex to seal it up.
    We then used a holesaw (at an angle) to fit eight rod holders, two 15 degree rod holders in each gunnel, fore and aft of the grab rail, a 30 degree in each rear corner, and two vertical in front of the ourboard well to mount the baitboard. This was no small task, with the port side rear rod holder needing to be shortened to clear a gusset under the gunnel. This is a design flaw, as the fuel filler prevents moving the rod holder any further to the rear. We shortened the rod holder and put a 3/16 stainless screw and nut to replace the locating pin.

    The final task for the initial fitout was to fit the compass. The dash has a molded platform that makes fitting a flat bottom compass very easy, with a 3mm hole to run the light wire through, and a couple of dabs of Sikaflex to hold it in place. Using the Garmin 750S as engine instruments means that the only things on the dash are the compass, the alarm light, and the switch panels.

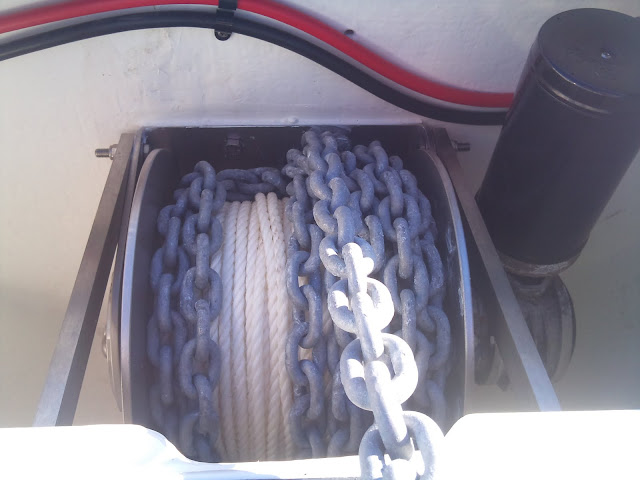
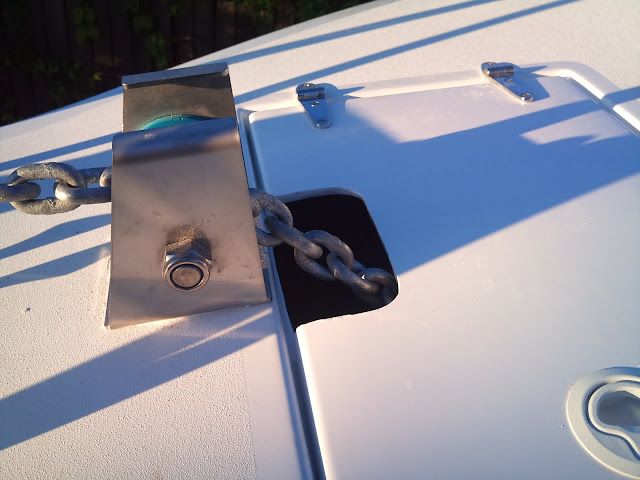
    Since the initial fitout, I have fitted a Micks Winch, with its own novel to describe the fitting and the challenges faced. It works well for what we need to do.


    Into the future as dollars allow, we will fit a set of trim tabs and a set of outriggers. I also intend to fill the void in the passenger seatbox with expanding foam to insulate it for use as an Esky.
    When that is done we reckon we will have an ideal fishing platform for South Coast NSW, economical and functional.

    So what have I missed?

  2. #2

    Re: Caribbean Reef Runner fitout with piccies

    thylacene well done on an excellent fit out job mate and congrats on the new rig she looks fantstic. The only thing I can think you have missed is an epirb but it may not be required where you take her. So other than that shes good to go and get some blood and scales on her I reckon.
    Cheers Axl

  3. #3

    Re: Caribbean Reef Runner fitout with piccies

    Mate, awesome effort,that is one well fitted out boat. As we have all found out at one time or another "hindsight" is something that we all wished we had
    But I bet you are glad to look back and proudly say that "you" did all that.

    Mate,roughly how much was the winch setup?it certainly looks the goods.

    Thylacene, you have asked what you have missed, please do not take this the wrong way but I couldn`t see an all round anchor light,mind you,my bloody eyesight is not what is use to be!!
    Once again mate,well done with your report and pics,now you just need to add fish & beer
    Cheers
    Kerrod

  4. #4

    Re: Caribbean Reef Runner fitout with piccies

    EPIRB, Fire extinguisher, Flares and all mandatory safety gear were transferred from our previous boat.

    All round light is mounted on top of the hardtop, it is the fold down variety.

    Winch was $2000 with rope and switch, circuit breaker, solenoid and blue roller from www.mickswinch.com.au I then spent another $200 on lugs, cable and dual wall resin filled heatshrink, and $280 for the bracket and braces. All up without my time it was a $2600 job taking into account the fibreglassing I had to do when I removed the divider in the well.

    I did a separate write up on the winch on this forum here http://www.ausfish.com.au/vforum/sho...d.php?t=173151

    We are very happy with the setup.

    Cheers

    Thy

  5. #5

    Re: Caribbean Reef Runner fitout with piccies

    Quote Originally Posted by Axl View Post
    thylacene well done on an excellent fit out job mate and congrats on the new rig she looks fantstic. The only thing I can think you have missed is an epirb but it may not be required where you take her. So other than that shes good to go and get some blood and scales on her I reckon.
    Been lots of blood and scales already, that's how we got 110 hours on it in four months

    Lots of post fishing scrubbing too though. Deckwash makes that job so much easier

  6. #6

    Re: Caribbean Reef Runner fitout with piccies

    nice job mate ,and youve got it done pretty quick.we all have to redo certain things on a fit up ,its part of the course.good to see your getting plenty of use out of her,cheers dave

  7. #7

    Re: Caribbean Reef Runner fitout with piccies

    Quote Originally Posted by OPTI View Post
    nice job mate ,and youve got it done pretty quick.we all have to redo certain things on a fit up ,its part of the course.good to see your getting plenty of use out of her,cheers dave

    Not to the standard of your 233 but a man should have goals for his retirement, still nits not too bad for a girls boat. Just wait until I get to do the next one.

    Haven't gone without fresh fish since we put it in the water, just another week and we can go chase YFT

    Cheers

    Thy

Posting Permissions

  • You may not post new threads
  • You may not post replies
  • You may not post attachments
  • You may not edit your posts
  •  
Join us